How To Get Your Summit Roof Ice Melt System
Overview:
Getting your roof ice melt system from mere concept to complete ice protection reality is easy! Summit’s products can be easily installed onto most new and existing roofs without the significant expense of removing and installing new roofing.
Procedure:
1. Client: Gather preliminary information for your roof ice melt system
For New Construction and existing roofs:
- Roof plan (including any gutter and downspout locations)
- Building elevation drawings (including any gutter and downspout locations)
- Site plan locating walkways, decks, driveways, sensitive locations
- Building specifications or details that would affect the installation or operation of a roof ice melt system
- Voltage(s) available for powering the roof ice melt system
- Building Elevations and recommendations
For Existing Roofs:
• Complete and submit Jobsite Data Form. Including photos can be extremely helpful.
2. Summit: Design roof ice melt system
- Review and incorporate drawings, details and specs as appropriate for the project
- Integrate the mechanical and electrical System Layouts and provide proposal with:
- Suggested power feed locations
- Roof ice melt system Layout with estimated amp loads and circuit breaker sizing
- Suggested controller and temperature sensor locations
3. Summit: Provide Installation Support Services
- System Installation and Operation Guides and training
- Control panel schematics
- System Layout
- Electrical testing procedures and logs
click here to download the jobsite data form for a complete quotation

Ideal for New Construction

Easily installs onto existing roofs.
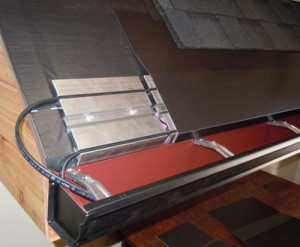
Summit extends the heating system through gutters and downspouts